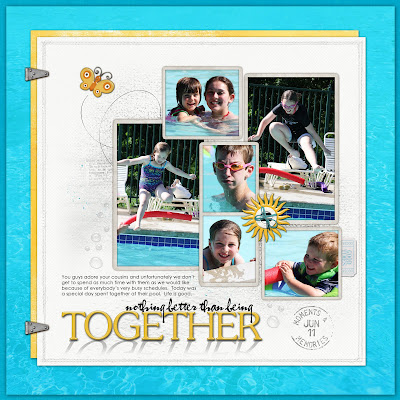
You will notice on my title that it has a shadow cast down from it. I thought I would share with you how to do this little trick. It takes no time at all once you get the hang of it. I should tell you that I use Photoshop CS2 so your steps might differ slightly based on the program that you use but I think this will give you the general idea.

1) First hit the letter "D" to get your foreground color to black and background color to white.
2) Put your title into position.
3) Once you get your title in place, create a layer beneath the title layer. Then go back and highlight the title layer that you would like to place a shadow on. With your title layer highlighted...click "control" and "the left button on your mouse" at the same time to get marching ants around the title.
4) Now highlight the blank layer in the layers palette that you had just created below your title layer and hit "backspace" and "Alt" at the same time. This created your same title behind your original but it is now in black. Hit "control - D" to deselect.
5) With your new background title layer still highlighted in the layers palette, hit "control- T" so that you are able to transform this layer. Grab the top of the box and drag it down so that the bottom still lines up with the bottom of the title...see the photo below.

6) Now take the marquee tool and place a box around half of the new title that is upside down. Go to "Select" on your top panel and navigate to feather. I used a value of 30 to feather the edges of this box and then I hit delete. Hit "control - D" to deselect. Your image should look similar to the photo below.
 7) Now we are going to adjust the shadow a bit so it isn't directly down from the title. Hit "control - T" (transform). While you left click your mouse, hit control and shift at the same time and nudge the bottom of your new titlework slightly until it is at an angle. When you do this, make sure that the bottom of your title and the top of the shadow still meet.
8) Reduce the opacity of the new shadow. I reduced mine to 24%. I would then attach it to your original title so that nothing shifts out of place.

Eight steps might seem like a lot but it really isn't. Once you get the hang of it, it is very simple to do. I'm sure there are other ways of doing this but this is the method that I have used for a long time. I really like the depth that the shadow work gives to my layout. I hope you give it a try.
All products are from Designer Digitals.
Thanks for stopping by and have a wonderful day!
No comments:
Post a Comment