Wednesday, June 29, 2011

Sweet Olivia

My dear friends Kris and Scottie and big brother Leighton welcomed beautiful baby Olivia into the world last week. I am beyond thrilled for them. We got to spend some time with Olivia earlier this week and I could have easily taken her home with us. She is just precious and I loved holding her. I miss those days. Kris asked me to take some photos of Olivia and of course I was so excited. She did such a great job. Here are some photos of her. I just wanted to soak up every little detail of her tiny little body. Life is such a gift!


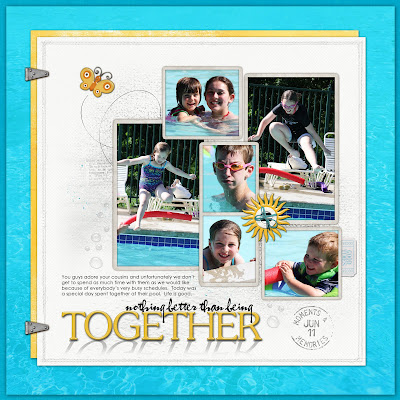
I couldn't wait to create a page for that beautiful little face.


All products are from Designer Digitals.


Thanks for stopping by and have a great day!

Tuesday, June 28, 2011

Page within a Page - Technique Tuesday

When I post pages in my gallery, I often get this comment..."I know it is one of your pages before I even click on the thumbnail". I guess this means that I have a very unique style. I think there are several techniques that I really like to use that give my pages their own style. One of these techniques that I often use, I refer to as "a page within a page".

I will often create the main portion of my layout first on a 12 x 12 screen filling the entire screen. I think this technique originated because I didn't feel like my pages were done when I initially did this. I wanted to incorporate more paper, more colors and more clustering. I would like to share with you some ways in which I create the page within a page look.

Thankful for you - On this particular page, I created the main portion of the page first. It consisted of the photo of Jeff and the kids, the blue and brown papers, the stitching, the titlework brushwork and clustering around the photo. Once I had that portion of the page created, I then resized it so it was smaller and I could incorporate another color of paper that would frame it. I like to have the main portion of my page off centered a bit. I think it adds more visual interest. After I had the page in place, I always try to tie the main portion of the photo into the background paper so it all flows together. On this page, I tied the two pages together with a simple clustering in which cluster on the top right portion of the inner page overlaps onto my "frame". It is just a subtle little detail of the bird overlapping and the date tag behind that I feel brings this page together.

Zoo - On this page, I again created the main portion of the page. As you can see there was a band of striped paper that I had going across the inner portion of the page which at the time filled the entire 12 x 12 screen. When I resized the inner portion of the page, I extended the band to look as though it was anchoring the inner page to the outer page. I also added some additional embellishments behind the focal part of the page that brought these two pages together.


My Little Man - On this page, it is obvious that there are two different pages going on here. On this page, I used shadow work and brushwork to give the page more depth. The shadow technique that I used is the same technique that I shared with you a couple of weeks ago on my blog pertaining to shadowing your title. It is a simple technique but I like the look it creates.


My Heart - You can see that on this page, I have several layers going on. I like to use this look to create depth. Depth is very big in my little world. I think that the photo corners helps unify this entire layout.


Life is in Details - I created the main portion of this page and it just didn't feel right. If something doesn't feel right, I immediately shrink it to see if I can add some type of framing that will set the page off better. On this page, you can see that I framed it and one of the things that added was a ribbon band (it is actually a frame that I like the texture of) running between the inner page and the white matte behind it. It is subtle but I think it again helps ground the whole page. I also added a cluster behind the inner portion of the page to give it more details as well as the loop da loop from the butterfly that overlapped the inner page and outer page.


Con Artist - Another technique that I use a lot is called "spilling over". I like to use a blended image and then when I go to frame it, I like it to spill over to the framing on the page. I achieve this look by layering and playing with blending modes and opacity. "Spilling" allows you to frame the focal area of your photo while also incorporating it into the background.


In My Eyes - This is another example of the "spilling over" technique. You can see that I have multiple layers of photos here. I brought them all together with the butterfly and brushwork on the upper right hand corner.


All products are from Designer Digitals.


I think that the "page within a page" look is unique and I think it opens a whole world of possibilities. I hope you found this helpful.


A special "thank you" to Linda for suggesting this topic for my blog. I love sharing my passion with others. I'm thinking about running a series called "Technique Tuesdays" during the summer in which I share a technique that I use with you every Tuesday. If you have ideas for things you would like me to incorporate, please let me know in the comments.


Thanks for stopping by and have a wonderful day!

Sunday, June 26, 2011

At the Farm

We spent the weekend at one of my most favorite places on earth...my aunt and uncle's farm. It is beautiful, it is peaceful, and we just treasure our time with them. It is always, always a highlight for our family. Here are some pictures from the weekend....


Uncle Jerry pulling weeds and finding worms...


The whole farm is just gorgeous....it is set on top of a hill so you can see forever and there are beautiful flowers and rolling fields wherever you look.


I hope everybody had a good weekend...thanks for stopping by!

Tuesday, June 21, 2011

Evolution of Scrapbooking Style

Today I was thinking about my journey as a scrapbooker and how my style has evolved. I started scrapbooking in college and it has been such a fabulous hobby for me. I scrapbooked with traditional paper up until about 3 years ago. There are certainly things that have changed over the last twenty years (yikes...twenty years) but I have always, always found so much joy and fulfillment when I sit down to create.


It was at the end of June 2009, that I found the courage to upload my very first layout to Designer Digitals. I thank God for giving me that courage because it has been a tremendous blessing in my life. I have developed so many wonderful friendships and found incredible support and inspiration from our community.


I thought it would be fun to take a little stroll down memory lane to see how my style has evolved over the last five years. I selected pages that I created in the summer of each year. Please forgive the quality of the paper image photos.


June 2007. I was obviously a paper scrapper who ALWAYS did two page layouts. I liked solid cardstock and only a few embellishments.


July 2008. I was still creating only two page spreads. I would say this is a hybrid project because I printed the title on paper and cut them into strips. The photo block on the left was also created in Elements and printed as one image. I was still loving the solid cardstock but added a little patterned paper.


June 2009. Here is the very first layout that I ever posted online at Designer Digitals. I didn't sleep that night. I was so nervous. I am still doing all two page spreads and haven't yet discovered the beauty of digital products. I did a little blending here and attempted some reflective titlework. I am adding this page to the "redo" list!


June 2010. I have now discovered the beauty and fun that coincide with digital products. I have switched to mostly one page layouts because there is so much more versatility with them.


June 2011. I don't know that my style has evolved much over the last year. I still like to use solid colors, blended photos and a few embellishments.


All products are from Designer Digitals.


I look at my pages from earlier and I just cringe but just like life....scrapbooking is about growth. The important fact is that I have these memories recorded and years down the road if I have more time, I can always redo the pages. I encourage you to go back in your pages and look at the layouts that you created from previous years. It is fun to relive those memories and to see how you have changed as a scrapbooker.


Thanks for stopping by and have a great day!

Sunday, June 19, 2011

Father's Day

I hope everybody enjoyed their father's day. We certainly did. Father's day provides the perfect opportunity to think about the men in your life. As some of you may know that we had a rough start to the year with my father suffering a stroke. The stroke impaired his vision. He was in the hospital for a week and then came to live with us for a couple of weeks. He couldn't drive for two months and then slowly his vision started to get better. I am so happy to report that last week he went back to the optometrist and his vision is back to 100%. I am so thankful to God for His work in our lives!

I am also very grateful for a husband who adores his children and always, always puts his family first.


Papa (Jeff's dad) is also a HUGE blessing in our lives. He is always more than eager to help out with the kids and goes out of his way to spend time with all of us. Days with Papa are among the best.


We celebrated father's day by heading to the beach. It wasn't very warm but the kids had a blast!


This lady was at the beach and brought her turtle and the kids were very intrigued.


The kids watching the boats take off from the other dock...I love this photo!


I hope that your weekend included time with those you love. Thanks for stopping by and have a great day!

Tuesday, June 14, 2011

Shadow your Title - Digital U

One of the things that I love about Photoshop is that you can do so many little things that make a big impact on your page. Tonight I created this fun little page about my kids and their cousins enjoying a day at the pool. This page came together in no time...I love it when that happens!


You will notice on my title that it has a shadow cast down from it. I thought I would share with you how to do this little trick. It takes no time at all once you get the hang of it. I should tell you that I use Photoshop CS2 so your steps might differ slightly based on the program that you use but I think this will give you the general idea.


1) First hit the letter "D" to get your foreground color to black and background color to white.


2) Put your title into position.


3) Once you get your title in place, create a layer beneath the title layer. Then go back and highlight the title layer that you would like to place a shadow on. With your title layer highlighted...click "control" and "the left button on your mouse" at the same time to get marching ants around the title.


4) Now highlight the blank layer in the layers palette that you had just created below your title layer and hit "backspace" and "Alt" at the same time. This created your same title behind your original but it is now in black. Hit "control - D" to deselect.


5) With your new background title layer still highlighted in the layers palette, hit "control- T" so that you are able to transform this layer. Grab the top of the box and drag it down so that the bottom still lines up with the bottom of the title...see the photo below.


6) Now take the marquee tool and place a box around half of the new title that is upside down. Go to "Select" on your top panel and navigate to feather. I used a value of 30 to feather the edges of this box and then I hit delete. Hit "control - D" to deselect. Your image should look similar to the photo below.


7) Now we are going to adjust the shadow a bit so it isn't directly down from the title. Hit "control - T" (transform). While you left click your mouse, hit control and shift at the same time and nudge the bottom of your new titlework slightly until it is at an angle. When you do this, make sure that the bottom of your title and the top of the shadow still meet.


8) Reduce the opacity of the new shadow. I reduced mine to 24%. I would then attach it to your original title so that nothing shifts out of place.


Eight steps might seem like a lot but it really isn't. Once you get the hang of it, it is very simple to do. I'm sure there are other ways of doing this but this is the method that I have used for a long time. I really like the depth that the shadow work gives to my layout. I hope you give it a try.


All products are from Designer Digitals.


Thanks for stopping by and have a wonderful day!


Sunday, June 12, 2011

Masterful Scrapbook Designs Webinar

I hope everybody had a good weekend. I just wanted to let you know about some of the live webinars that are coming soon at Masterful Scrapbook Designs. Each month they have four guest teachers that talk about a specific topic. The topic for June is photos. I have really enjoyed learning more from the other guest teachers this month through the written pdfs and I'm looking forward to catching the other webinars that are coming up. Here is the schedule if you are interested. If you would like to listen, just head over to Masterful Scrapbook Designs and register.

Katrina Kennedy - Tuesday, June 14th at 8 pm eastern time
Jana Morton - Wednesday, June 15th at 1 pm eastern time
Karen Grunberg - Wednesday, June 22nd at 9:45 pm eastern time

Thanks for stopping by....have a wonderful day!

Wednesday, June 8, 2011

Thoughts on Motherhood

Ellie finished school yesterday with tears in her eyes. She loves to go and she is just like her mom in a lot of ways...especially in the fact that she wears her heart on her sleeve. I tried to explain to her that she should be so grateful that she had such an amazing year with so many fond memories and wonderful experiences.


As we begin the summer, I have mixed emotions as a mom...I am excited about spending more time together...I'm exhausted just looking at our schedule...I'm looking forward to creating wonderful memories and enjoying each other...I'm worried about keeping up with everybody and the daily challenges that accompany having three kids...I'm hoping to be able to find some time with just Jeff as well as to time for myself...I'm hoping that everybody stays safe and remains healthy...I'm excited for a couple of my dear friends to welcome babies this summer.


Lately I have been thinking about what it means to be "mom". It is a role that I cherish more than anything and I feel so incredibly blessed to have three healthy children and to be able to spend my days taking care of them. I am so grateful to God for each of them and their unique personalities. I have been "mom" for seven and half years, and I cherish these three little souls like nobody's business but to this day...it still blows my mind that it can possibly be this much work. How did my mom make it look so easy? Sometimes I get in what I call "the mom rut" in which all I feel like I am doing is scheduling, running kids around, telling them to pick up after themselves, disciplining, redirecting and resolving conflict. There are days when it all seems so monotonous and I question the significance of what I am doing.....I had one of those days earlier this week and then I came across this little story. I am doing a Beth Moore bible study right now which I love and she shared this story which just struck me.


When I was little, my nurse Dibby's cousin had a dog, just a mutt and the dog was pregnant. I don't know how long dogs are pregnant, but she was due to have her puppies in about a week. She was out in the yard one day and got in the way of the lawn mower and her two hind legs got cut of. They rushed her to the vet and he said, "I can sew her up, or you can put her to sleep if you want, but the puppies are okay. She'll be able to deliver the puppies."


Dibby's cousin said, "Keep her alive."

So the vet sewed up her backside and over the next week the dog leanred to walk. She didn't spend any time worrying, she just learned to walk by taking two steps in the front and flipping up her backside, and then taking two steps and flipping up her backside again. She gave birth to six little puppies, all in perfect health. She nursed them and then weaned them. And when they learned to walk, they all walked like her.

I took a lot from this little story. It made me laugh but most importantly it made me realize that even though there might be times when I don't feel like what I am doing matters...somebody is watching and learning from every move I make and that is VERY SIGNIFICANT!

Have a wonderful day and thanks so much for stopping by.

Friday, June 3, 2011

Scrapbook Pages

I hope everybody has had a great week. We have experienced a significant change in weather...we went from 50 degree temps to 90 degrees in what seems like a few days. I would take the heat any day over cold weather. We have had a good couple of weeks....school is winding down for Ellie and soon we will be in full summer mode. We have a very busy summer planned. I will spend a lot of time running kids around. I haven't posted any layouts here for a long time so I thought I'd post some from the last few weeks. All products are from Designer Digitals.


Thanks for stopping by and have a wonderful weekend!